Whether you’re replaying the original Final Fantasy VII on modern emulation, diving into Final Fantasy VII Remake on PS5, or exploring the expanded world through Crisis Core Reunion, understanding the Final Fantasy VII map is essential to mastering the game. The world of Midgar and beyond has captivated players since 1997, but its layout can be overwhelming for newcomers and even returning veterans. This guide breaks down every major location, hidden area, and secret passage across the Final Fantasy VII map, covering both the classic original and the modern remake interpretations. From the industrial sprawl of Midgar’s sectors to the mysterious Northern Crater, you’ll find everything you need to navigate Gaia efficiently and uncover every easter egg along the way.
Table of Contents
ToggleKey Takeaways
- The Final Fantasy VII map is divided into two major regions: Midgar, an industrial city with eight numbered sectors, and the Overworld, a sprawling continent that opens after escaping the city and rewards systematic exploration.
- Understanding the Final Fantasy VII map’s layout—from Sector 1’s Mako Reactor to the Northern Crater’s multiple difficulty floors—is essential for mastering both the original game and the 2020 Remake’s reimagined structure.
- Acquiring transportation upgrades strategically (Chocobo, Buggy, and Highwind airship) dramatically reduces navigation time and unlocks previously inaccessible areas and hidden locations across the Overworld.
- Hidden Ultimate Weapons, rare Materia, and secret story revelations are scattered throughout obscure locations and require active exploration, NPC interaction, and thorough environmental investigation to discover.
- The Final Fantasy VII Remake shifts from the original’s top-down perspective to a third-person camera and chapter-based structure, making each sector feel like a dense, interconnected neighborhood rather than an abstracted mission location.
- Completionist playthroughs take 80-100+ hours by mapping all sectors, solving environmental puzzles, and defeating optional Superbosses like Emerald Weapon, while speedrunners optimize routes to reach the Northern Crater in under 12 hours.
The World Of Final Fantasy VII: Understanding The Game’s Layout
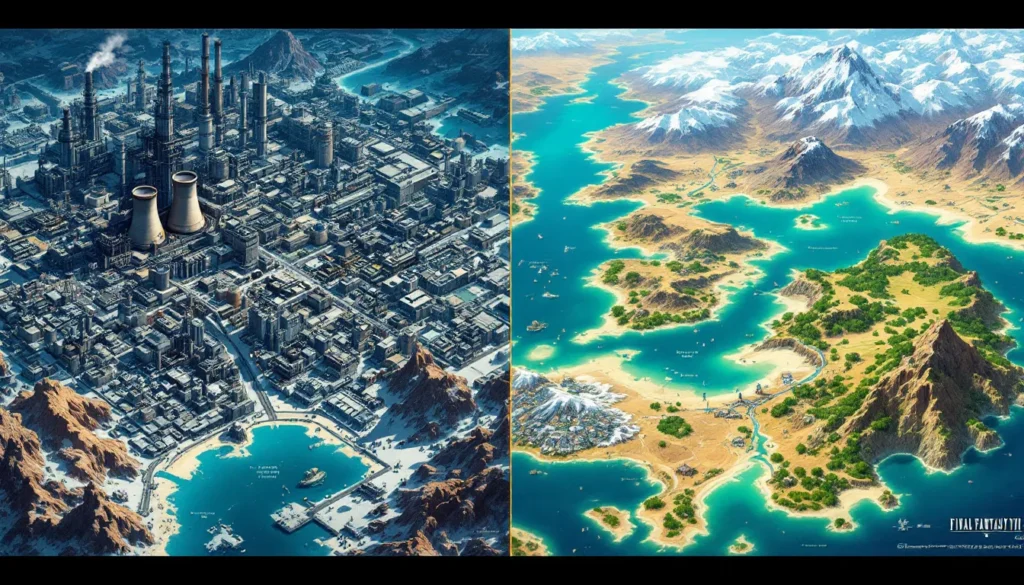
The Final Fantasy VII map is deceptively massive. It’s divided into two major regions: Midgar, the sprawling industrial city where the first several hours of the game take place, and the Overworld, an expansive continent that opens up after you escape the city. Understanding this structure is crucial because each area has its own ecosystem of quests, secrets, and story beats.
Midgar itself is broken into numbered sectors, eight in total, plus the massive Shinra Headquarters and the mysterious deeper underground areas. Each sector operates as a vertical city, with upper and lower slums representing the extreme wealth gap in the world. The Overworld, by contrast, is a sprawling landscape of towns, dungeons, environmental hazards, and landmarks scattered across deserts, mountains, and coastlines.
The original game’s map uses a top-down perspective on the Overworld, which can feel cramped by modern standards but actually rewards exploration because hidden areas are genuinely hard to spot. The Final Fantasy VII Remake, released in 2020 with the Windows PC port in 2021 and the PS5 Pro version showing enhanced visuals, reinterprets Midgar entirely. The remake’s Midgar is linear, mission-based, and story-focused, it’s a completely different beast from the original’s freewheeling structure. Understanding which game you’re playing is essential for knowing what to expect.
Midgar District Overview
Midgar is a vertical city divided into distinct sectors, each with its own vibe and story importance. The city is built on massive pillars that support the upper plate, where the wealthy live, while the poor inhabit the lower slums beneath the metal sky.
Sector 1: Mako Reactor and Surroundings
Sector 1 is home to the Shinra Electric Power Company’s Mako Reactor, one of the game’s earliest and most iconic locations. In the original game, the Reactor appears as a massive facility where Cloud and his crew infiltrate to destroy it, a pivotal story moment that sets the entire plot in motion. The surrounding area includes the Bombing Mission opening segment, where you first meet Avalanche members and get a taste of Midgar’s gritty streets.
The reactor itself is vertically designed, with multiple floors and deadly security. Early in the game, you’ll face Scorpion Sentinel, the boss guarding the reactor core. This area introduces new players to the game’s ATB (Active Time Battle) system. In the remake version, Sector 1 gets a significant narrative expansion with multiple locations and side missions that flesh out the connection between Cloud, Avalanche, and the people directly affected by Mako extraction.
Sector 7 and the Slums
Sector 7 represents the heart of the rebel resistance movement and is where many major plot points unfold. The slums are grimy, industrial, and full of life, shops, NPCs with real problems, and side quests that give the world texture. The iconic Seventh Heaven bar, Avalanche’s headquarters, sits in this sector. It’s a central hub where you’ll return repeatedly throughout the game.
The Sector 7 Plate Collapse is one of the most emotionally impactful moments in Final Fantasy VII’s story, and revisiting the area afterward has a different weight to it. The remake devotes an entire chapter to this sector, making it feel like a genuine neighborhood with interconnected stories rather than just a mission location. If you’re doing a completionist run, Sector 7 has some of the best side quests and hidden treasures in the city.
Sector 5: Botanical Garden and Aerith’s Church
Sector 5 is visually striking, it’s the wealthy sector with the Shinra Headquarters looming large. The Botanical Garden is a stunning location that contrasts sharply with the industrial grime of other sectors. This area is crucial to Aerith’s storyline and contains important plot revelations.
Aerith’s Church, located in the Sector 5 slums, is one of the most memorable locations in any Final Fantasy game. It’s a serene, flower-filled refuge in the middle of concrete chaos. The moment you first enter the church sets the tone for Aerith’s character arc. In gameplay terms, it’s also where you can find powerful Materia and trigger unique character interactions. The remake expands this area significantly, making the church feel like a genuine sanctuary with layers of history and emotion backing every pixel.
The Northern Crater and Endgame Areas
The Northern Crater represents the final dungeon of Final Fantasy VII and is where the game’s ultimate confrontation takes place. It’s a colossal, otherworldly structure jutting from the earth, guarded by countless enemies and environmental hazards. Accessing the crater requires you to have obtained the Highwind, your airship, which unlocks late-game exploration.
The path to the Northern Crater involves traversing the Icy Continent and navigating treacherous ice caves. The area is packed with dangerous high-level enemies, including some truly devastating ones like the Ultimate Weapons, boss enemies that carry rare Limit Break manuals for each character. Before attempting the crater itself, most players spend time grinding levels, optimizing Materia builds, and collecting optional gear.
Inside the crater, you’ll descend through multiple floors of increasing difficulty. The design emphasizes verticality and isolation, you’re descending into the planet’s core itself. The final boss gauntlet at the crater’s bottom is one of gaming’s most epic climaxes, requiring careful preparation. The environment tells a story of Jenova, the planet’s infection, and the remnants of Sephiroth’s influence. Even the colors shift as you descend, moving from cold blues to sickly greens and corrupted purples.
For completionists, the Northern Crater region also contains hidden locations with Ultimate Weapons if you know where to look. The original game rewards explorers who take time to examine every corner before the final descent.
The World Map: Navigating The Overworld
Once you escape Midgar and gain access to the Overworld, Final Fantasy VII’s map expands dramatically. The continents are sprawling, filled with towns, dungeons, landmarks, and environmental puzzles. Navigation on the original’s top-down map can feel clunky at first, but it rewards systematic exploration.
The Overworld connects all the game’s major story locations through a combination of field maps and a world map. You’ll travel by Chocobo (a docile bird you can ride across the overworld), the Buggy vehicle, or eventually the Highwind airship. Each transportation method unlocks different areas, Chocobos can cross certain terrain, the Buggy handles off-road passages, and the airship offers complete freedom with some restrictions.
Key landmarks include volcanoes, ancient temples, lush forests, and desolate wastelands. Each region reflects a different aspect of the planet’s history and the impact of Mako depletion. The environmental design tells stories without explicit exposition, you can see where Mako reactors have drained the land and where nature has reclaimed civilization.
Major Cities and Towns Outside Midgar
Kalm is your first major destination after leaving Midgar and serves as a transition zone between the industrial city and the wider world. It’s a sleepy farming village where Red XIII’s backstory gets explored.
Junon is a sprawling military city built around a massive cannon. You’ll spend significant time here during the story, and it features some of the game’s best character moments. The town is split between upper and lower areas, with the underwater entrance to the Underwater Reactor adding environmental variety.
Cosmo Canyon is a desert town home to the Cosmosphere, an ancient structure that holds crucial story information. Red XIII’s home is here, making it emotionally important to his character arc. The town itself is built into a canyon wall and has a warm, mystical aesthetic that’s a nice contrast to Midgar’s cold steel.
Nibelheim is a critical story location tied directly to Cloud and Sephiroth’s pasts. The town is relatively small but dense with narrative content. The Nibelheim Reactor looms in the background, and the surrounding areas contain some of the game’s most important dungeons, including the Mythril Mines and Mt. Nibel.
Rocket Town is a quirky location centered around an abandoned space program. The area’s resident Cid has one of the game’s most compelling character arcs, and the town itself reflects the clash between ambition and failure.
Golden Saucer, Costa Del Sol, and Tourist Destinations
Golden Saucer is an enormous amusement park and casino complex that’s pure spectacle. It’s the largest single location outside Midgar and contains a massive Chocobo racing track, slot machines, a secret underground fighting arena, and even a small aquarium. You can spend hours here playing mini-games and building up GP currency. The Saucer has authentic fairground energy, it feels genuinely fun and occasionally ridiculous, which is exactly the point.
The Round Square at the heart of Golden Saucer hosts the main activities, but there’s also the Wonder Square with arcade games, the Golden Saucer Battlefield for advanced combat encounters, and the Chocobo Track where you can breed and race chocobos. Completion hunters will need to spend significant time here.
Costa Del Sol is a resort town on a sunny beach, a place where normal people vacation. The contrast is intentional: it’s one of the few genuinely happy, peaceful locations in the game. You can stay at the beach, talk to tourists, and genuinely relax for a moment before the weight of the world comes crashing back. The town is small but thematically important for showing what normal life looks like in this world.
Other tourist destinations like Bone Village (an archaeological site built over fossil beds) and the Coral Valley offer unique environmental challenges and often contain valuable rare Materia. These areas reward thorough exploration with powerful equipment and story details.
Underground and Hidden Dungeons
Final Fantasy VII is packed with underground locations that don’t appear on the standard world map. These hidden areas often contain the game’s best loot and toughest optional challenges.
The Underwater Reactor beneath Junon is accessed through a submarine sequence and features unique underwater battles. It’s visually distinct from other reactors, with bioluminescent enemies and a sense of deep isolation. Clearing this reactor is optional but yields valuable materia.
The Sunken Gelnigeah is a massive underwater city that serves as one of the game’s most elaborate dungeons. This area is easy to miss entirely if you’re not actively looking for it, but it contains some of the best optional boss fights and treasure in the game. The dungeon layout is genuinely complex, with multiple vertical levels and interconnected passages. Players will need good navigation discipline and strong Materia builds to handle the high-level enemies here.
The Crater beneath North Corel hides powerful optional bosses and unique equipment. It’s an underground cavern system that requires specific conditions to access fully. Speedrunners and completionists have spent serious time mapping every secret here.
Cosmo Memory locations scattered across the world contain story information and powerful Materia. These aren’t traditional dungeons but rather hidden chambers accessed through puzzle solutions or specific conditions. Finding them requires genuine detective work, checking suspicious terrain, talking to NPCs multiple times, or revisiting areas after story events.
The Sunken Gelnigeah and Bonus Content Areas
The Sunken Gelnigeah is a lost underwater civilization that represents one of Final Fantasy VII’s greatest secrets. It’s accessible only after obtaining a submarine in the Rocket Town area, and even then, you need to know the approximate coordinates to find it. The city contains advanced Materia shops and boss fights that rival the Northern Crater in difficulty.
The layout of Sunken Gelnigeah is labyrinthine, rooms are accessed through underwater passages, and the color palette shifts from blue to mysterious purple in the deepest chambers. Players report spending hours mapping this location on their first playthrough because the scale is genuinely disorienting. The boss enemy here, Emerald Weapon, is one of the game’s most challenging optional encounters and requires serious preparation.
Bonus content areas in the original game include the Superboss arenas hidden throughout the Overworld. Ruby Weapon lurks in a desert area and requires specific conditions to summon. These are deliberately obscure and require either guides or genuine exploration obsession to find.
Secret Locations and Easter Eggs
Final Fantasy VII rewards obsessive explorers with secrets that can easily be missed on a casual playthrough. The game’s design intentionally hides powerful items and story revelations in locations you’d never think to check.
Ultimate Weapons and Rare Item Locations
Each playable character has an Ultimate Weapon that vastly outperforms standard equipment. Finding these requires either defeating specific bosses, solving environmental puzzles, or accessing hidden shops with rare currency.
Cloud’s Ultimate Weapon, the One-Winged Angel, is found in the Shinra Mansion safe. Accessing it requires cracking the safe’s combination, a puzzle that has existed online since the game’s release but is legitimately challenging to solve blind. The combination changes based on the game’s version, and hunting it down the first time feels genuine.
Aerith’s Ultimate Weapon is hidden in the Cosmo Canyon Observatory, accessed by solving puzzle sequences that involve moving through the building in a specific order. The reward feels earned when you finally get it.
Barret’s Ultimate Weapon requires collecting specific items scattered throughout the Overworld and bringing them to the Weapon Dealer in North Corel. This is a genuine collect-a-thon that rewards thorough mapping of the world.
Rare Materia like Knights of Round, accessed through the sunken island fortress, and Neo Bahamut require specific dungeon sequences or highly obscured locations. These legendary summons represent the endgame power fantasy and are worth the effort to hunt down.
Mystic Dungeon caves contain random rare items based on the terrain type. Some caves generate Ultimate Weapons through a RNG system, making them popular grinding locations for optimized runs.
Hidden Character Moments and Story Revelations
Final Fantasy VII contains numerous optional story beats that deepen character arcs without being mandatory. Visiting specific locations triggers monologues and flashbacks that aren’t required for story progression but enrich understanding of the characters.
Aerith’s Past can be explored more deeply by returning to her church multiple times. Each visit adds dialogue and triggers optional scenes that aren’t locked behind mandatory story progression. The church becomes increasingly significant emotionally as you understand her history.
Red XIII’s Backstory unfolds through conversations in Cosmo Canyon and Mt. Nibel. Returning to these areas after gaining specific items or completing story beats unlocks additional dialogue explaining his trauma and motivations. Players who rush past these locations miss substantial character development.
Yuffie’s Backstory is entirely optional, she’s recruited through a hidden random encounter on a specific world map screen. Finding her requires either prior knowledge or massive amounts of grinding in the correct area. Her personal quest to recover the Enormous Materia mirrors her character arc of overcoming shame.
Cid’s Past is explored through his connection to the Rocket Town and his relationship with a woman he failed to support. Revisiting locations tied to his history adds emotional context to his character. The Highwind itself becomes symbolic of both his greatest ambition and deepest failure.
Secret story revelations about the planet itself, Jenova’s origins, and the truth behind the Calamity are hidden in optional dungeons and books found in specific locations. Players willing to explore and read environmental storytelling gain a deeper understanding of the Final Fantasy VII universe than those who just follow the main plot.
How The FF7 Remake Changes The Map Experience
The Final Fantasy VII Remake, launched in 2020 for PS4 with enhanced versions on PS5 and a PC port in 2021, fundamentally reimagines Midgar’s geography and structure. This isn’t just a graphical update, it’s a complete reinterpretation of how players navigate and understand the city.
The original FF7’s Midgar is compact and somewhat abstracted: you move between sectors quickly and the verticality is largely implied. The Remake’s Midgar is sprawling, dense, and obsessively detailed. Each sector feels like a genuine neighborhood with interconnected streets, shortcuts, and environmental storytelling embedded in every corner. The scale is dramatically expanded, what took 15 minutes to traverse in the original might take 30+ minutes in the Remake because there’s simply more ground to cover and more to interact with.
The Remake shifts from the original’s top-down perspective to a behind-the-character third-person camera. This changes how you perceive space fundamentally. Verticality, which was abstracted in the original, becomes visceral, you feel the weight of massive pillars supporting the upper plate overhead, and climbing stairs becomes a genuine navigational challenge rather than a menu transition.
Story pacing also changes the exploration experience. The original FF7 lets you wander Midgar relatively freely, though certain areas are locked until story beats progress. The Remake uses a chapter-based structure where each chapter is a distinct mission with specific objectives. This makes navigation more linear, but it also allows for deeper environmental storytelling within each chapter. Players revisit locations but with changing contexts, a street that seemed safe becomes threatening after story developments, and familiar routes reveal new paths you hadn’t noticed before.
Navigating Midgar In The Remake Version
The Remake’s Midgar navigation relies heavily on way-points marked on the mini-map. Following these markers is straightforward, but players who actively explore beyond markers discover shortcuts, hidden shops, and optional fights that enhance the experience. The Remake rewards curiosity, backtracking to previously locked areas after story progression often reveals passages you’d previously missed.
Fast travel systems are limited in the Remake compared to the original: you can’t simply teleport between sectors like in the classic game. Instead, you use the train system within your current chapter’s area. This keeps the world feeling connected and prevents the abstraction of the original’s quick menu traversal.
Sector mapping is crucial. The Remake divides sectors into distinct districts and blocks, and understanding these layouts becomes important for finding optional content. Materia shops, item vendors, and secret boss arenas are scattered throughout, and finding them requires active exploration. The game rewards players who take time to fully explore each sector’s nooks and crannies.
During the Remake’s version of events that take place in an area, players have more environmental freedom. In the first chapter centered on Sector 1, you can explore surrounding streets, talk to citizens, and discover that the Sector is actually a living neighborhood rather than just a story location. This stands in stark contrast to the original’s more abstract approach where locations exist primarily for story purposes.
Tips For Exploring FF7 Maps Efficiently
Efficient exploration in Final Fantasy VII requires understanding the game’s design philosophy and planning your routes strategically.
First, acquire Chocobos early if you’re doing an Overworld run. Different Chocobo colors can traverse different terrain, gold chocobos cross mountains, red chocobos handle forests, green chocobos traverse deserts. Breeding the right Chocobo dramatically reduces navigation time for specific regions. The Chocobo Breeding mechanic at Gold Saucer is worth spending time on early in your Overworld exploration.
Acquire the Highwind as quickly as possible. Once Cid joins your party and you take control of the airship, exploration speed increases exponentially. You can bypass entire dungeon sequences, access previously unreachable areas, and complete side quests in a fraction of the time.
Map out Materia locations before committing to hunts. Knowing where specific rare Materia are hidden allows you to plot efficient routes. Traveling randomly burns hours: traveling with purpose completes objectives.
Return to areas after major story beats. NPCs give different dialogue, new paths open, and hidden items appear. A location you cleared early might have entirely new content after you progress the story.
Use guides for optimization, not discovery. If you’re doing a completionist run for the first time, consider exploring blind for the first playthrough. Once you know the general layout, guides become invaluable for precise hidden item locations and secret boss conditions.
Fast Travel Methods and Map Shortcuts
The Chocobo is your primary pre-Highwind transport. Color-specific chocobos open new terrain: green crosses deserts, black navigates forests, gold crosses mountains, and white travels across water. Breeding these takes patience but unlocks map shortcuts otherwise inaccessible.
The Buggy vehicle, acquired through Cid’s story, allows off-road travel across certain rough terrain. It’s not as versatile as a Chocobo, but it’s faster on flat plains and doesn’t require the breeding time investment.
The Highwind airship essentially removes all navigation restrictions. You can land almost anywhere on the world map, making ancient dungeons and hidden locations fully accessible. Using the Highwind effectively requires knowing where landing zones exist, some locations have hidden landing points not immediately obvious.
In Midgar specifically, the train system connects sectors in the Remake, and the subway tunnels in the original provide shortcuts between upper and lower slums. Learning these passages saves significant backtracking.
Door sequences in dungeons often have alternate paths. Exploring seemingly dead-end corridors sometimes reveals shortcuts that loop back to earlier areas, cutting navigation time significantly.
Best Routes For Speedrunners and Completionists
Speedrunners optimize routes to minimize backtracking while hitting mandatory story locations. The critical path skips entire regions, Overworld encounters, and hidden areas. Speed running FF7 typically focuses on: Midgar sequence → Kalm → Mythril Mine → Junon → immediate push to Northern Crater. Boss fights are often skipped entirely using glitches, and equipment is minimal.
Completionists take a fundamentally different approach. The optimal completionist route involves: thorough Midgar exploration → systematic Overworld mapping → side quest completion → Ultimate Weapon hunts → Superboss encounters → Northern Crater finale. This takes 80-100+ hours compared to the 8-12 hour speedrun.
For casual players, a balanced approach involves: following the main story while exploring each new area reasonably thoroughly, returning after acquiring transportation upgrades, and hitting major optional content like Golden Saucer and the Superboss fights. This typically takes 35-50 hours and captures the essence of the game without the obsessive completionist grind.
Online communities have developed optimized routes that combine story progression with efficient optional content gathering. Resources like Game8 have detailed walkthroughs with map coordinates for hidden items and optimal Materia acquisition routes. For deeper JRPG guides covering character builds alongside map navigation, RPG Site offers comprehensive resources that complement map exploration with combat strategy.
Patch notes and updates can shift optimal routes slightly. For current information on Final Fantasy XIV and similar titles, Starworlds 2010 provides updated guides that reflect the latest game versions. The original FF7 remains largely unchanged from its 1997 release, but modern ports and the Remake introduce variations that speedrunners and completionists need to account for.
Conclusion
The Final Fantasy VII map is a masterclass in environmental game design. From Midgar’s industrial sprawl to the Overworld’s diverse regions, every location tells a story and rewards careful exploration. Whether you’re navigating the original’s compact but dense city sectors or the Remake’s sprawling reimagined neighborhoods, understanding the layout separates casual players from those who uncover every secret.
The game respects player curiosity. Hidden Ultimate Weapons, optional story revelations, and legendary boss encounters are genuinely hidden, they’re not marked on maps or explained in dialogue. You find them by exploring, talking to NPCs multiple times, and paying attention to environmental details. This design philosophy makes thorough playthroughs feel like genuine discovery rather than menu-driven completion lists.
For players returning to Final Fantasy VII in 2026, whether through emulation, modern ports, or the ongoing Remake series, taking time to properly explore the map transforms the experience. The story is engaging, the characters are beloved, but the world itself, with all its forgotten corners and carefully placed secrets, is what keeps players coming back. Grab a guide if needed, but consider experiencing the map blind on your first run. The sense of discovery, of finding a hidden passage or stumbling upon an optional character moment, is irreplaceable. That’s what makes Final Fantasy VII’s world design timeless.

