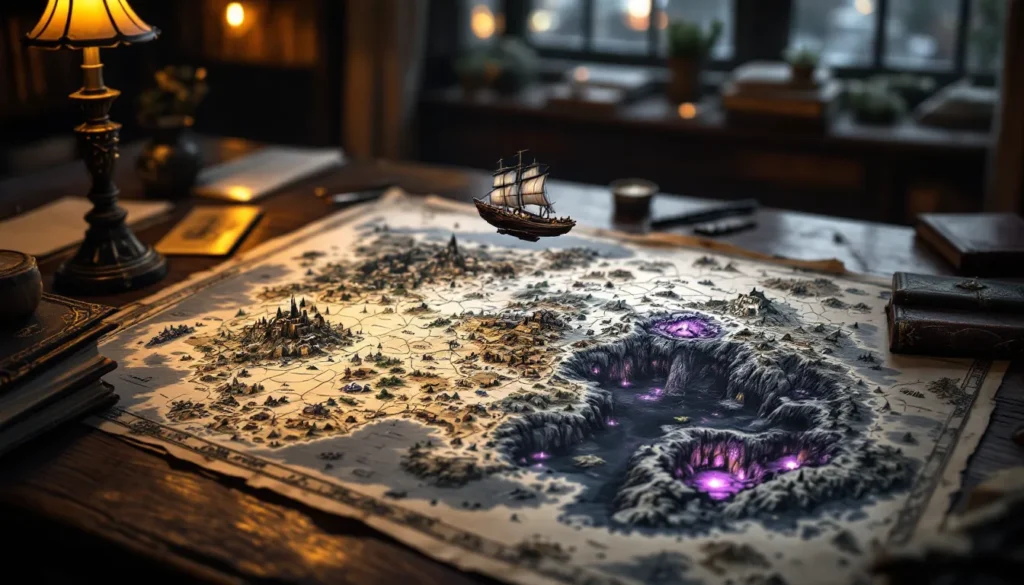
Final Fantasy III drops players into a sprawling world that’s equal parts beautiful and bewildering. If you’re navigating the game for the first time, or even on a replay, having a solid grip on the map layout saves hours of wandering. This guide breaks down every major region, town, and hidden corner so you know exactly where you’re going and what you’ll find when you get there. Whether you’re chasing story progression or hunting optional content, understanding the map’s structure is crucial to getting the most out of this classic.
Table of Contents
ToggleKey Takeaways
- The Final Fantasy III map is divided into the Surface World and Underworld, each with distinct regions, towns, and dungeons that unlock progressively through story events.
- Learning the Final Fantasy III map structure—including airship routes, dungeon layouts, and Teleport spell locations—saves hours of backtracking and improves navigation efficiency.
- The Underworld requires more strategic planning and map memorization than the Surface World, rewarding patience with powerful late-game equipment and exclusive enemy encounters.
- Secret areas like Falgabard and optional dungeons such as Dragon’s Den and Tower of Dwarves offer unique job crystals and rare loot for players who explore deliberately beyond the main story path.
- Using guides during your first playthrough and preparing resources before entering long dungeons prevents frustration without diminishing the experience of discovering Final Fantasy III’s interconnected world.
Overview Of The Final Fantasy III World
Final Fantasy III’s world is split into two main sections: the Surface World and the Underworld. The Surface World is where you’ll spend the first 60% of the game, exploring towns, castles, and dungeons across multiple continents. The transition to the Underworld happens mid-game and fundamentally changes how you navigate, suddenly, everything is darker, more dangerous, and the layout forces you to think differently about map traversal.
The world itself is surprisingly large for its era. Across both sections, you’re looking at roughly 15 major towns, dozens of dungeons, and countless small locations. Each region has distinct visual themes and enemy types, so understanding where you are geographically helps you anticipate what challenges lie ahead.
One thing that catches newer players off guard: the map isn’t one continuous landmass. You’ll use airships and other transport methods to hop between continents and islands. Planning your route before heading out saves time and resources. The game respects exploration but rewards preparation even more.
The Northern Continent: Starting Area And Early Game Regions
You begin in Canaan, a small village in the far north. It’s tutorial-light by design, you get a feel for the menu system and combat, then you’re pushed out into the world. From here, the northern continent is your playground for the first 10-15 hours.
Ur sits to the northeast and serves as a minor hub. It’s not critical to the main story, but the Tower of Owen nearby is worth exploring if you’re thorough. You’ll pick up some decent mid-level gear and experience if you tackle it early.
Heading south and west, you’ll reach Sasoon Castle. This is a major story beat and the first real dungeon-crawler experience. The castle itself is multi-tiered and can be confusing the first time through, but the loot and character progression here pay dividends. Just past Sasoon is Kazus, a town dealing with a poison problem that’s absolutely critical to the narrative.
Tozus is further south and acts as another story waypoint. It’s smaller than Kazus but important for progressing the plot. The Cave of Tides lies east of Tozus, it’s optional on paper but contains crucial items if you’re min-maxing your gear. The transition from open-world exploration to dungeon-focused progression happens naturally in this region. You start building your understanding of how the game blocks story progression behind specific dungeons and items.
The northern continent is forgiving, which is intentional. Enemy difficulty ramps gradually, towns are spaced reasonably close together, and you won’t soft-lock yourself into an unwinnable state easily. Use this region to experiment with job classes and build your core team.
Floating Continent And Sky Regions
The Floating Continent is where the game’s story kicks into overdrive. This isn’t a region you explore casually, it’s the endpoint of a specific sequence, and it fundamentally changes the world state. Without spoilers: reaching the Floating Continent triggers a major world event that restructures how you navigate the map afterward.
To get here, you’ll need an airship. The first airship is story-locked, but once you have it, the sky becomes your highway. Sky regions aren’t massive explorable zones like land areas, instead, they’re paths between continents and islands. The airship doesn’t land just anywhere: specific locations are marked on your in-game map.
Djinn’s Fortress floats in the sky and connects directly to the Floating Continent sequence. It’s a gauntlet, both mechanically and narratively. Bring plenty of healing items and maybe a Dragoon or two for the boss encounters. The treasure here is solid, especially if you’re running a specific job combo.
Once you’ve dealt with the Floating Continent, new sky locations open up. Eureka becomes accessible, it’s an island in the clouds that contains some of the game’s best optional loot. Getting here requires careful airship navigation, and you’ll need to know the exact coordinates or landmarks.
Sky regions require more planning than land-based exploration. You can’t just walk between towns: each airship trip is a deliberate choice. Mark your destinations, stock up before you go, and know where you’re landing. This is where the game’s pacing shifts from exploration-focused to destination-focused.
The Underworld: Hidden Depths And Dark Dungeons
The Underworld is genuinely ominous. After the story event on the Floating Continent, vast portions of the world sink underground, and you’re forced to navigate an entirely different map structure. The aesthetic change is dramatic, darker tones, more dangerous enemies, and a sense of being trapped beneath the earth. This region comprises roughly 30% of the total game, so it’s substantial.
The Underworld isn’t a single connected space. Instead, it’s a series of underground regions connected by specific passages. Replito is the first major Underworld town, and it serves as a hub for understanding what’s happened to the world. From here, you’ll branch out to different underground zones.
The Cavern of Darkness is massive and multi-layered. Navigation here is intentionally confusing, it’s meant to feel oppressive. Bring a map or use an online reference if you’re not into pixel-hunting for hidden passages. The reward is substantial: powerful weapons and armor that define your late-game loadout.
Tes is another critical Underworld settlement. It’s locked behind specific story progression, but once accessible, it opens routes to some of the game’s most dangerous dungeons. Enemies here hit harder and have more HP than anything on the Surface World. Your job selection matters immensely, Black Mage coverage becomes almost mandatory here.
The Sunken Tower is entirely optional but contains some of the best equipment in the game. It’s brutally difficult, though, save frequently and don’t wander in underleveled. This is where you separate casual players from completionists.
Underworld exploration requires patience. Backtracking is frequent, passages loop in unexpected ways, and you’ll miss things. That’s intentional. The Underworld rewards map memorization and exploration more than the Surface World. Take your time, use the save points liberally, and don’t rush through dungeons. The Underworld is where Final Fantasy III stops holding your hand.
Key Towns And NPCs: Story-Critical Locations
Saronia is the largest city in the game and serves as the political and military hub of the world. It’s packed with NPCs who drive the narrative forward. The castle here is where major story beats resolve, and it’s worth exploring every corner. You’ll get critical equipment and narrative exposition.
Amur sits on the western coast and acts as a waypoint between regions. It’s small but important for story progression. The Tower of Owen and other nearby dungeons feed into the larger narrative here.
Dwarven Cavern (accessible through Molten Cave) is where you meet the Dwarves, a race that becomes central to the late-game story. The Dwarves craft some of the best equipment in the game if you bring them the right materials. It’s worth bookmarking this location and returning multiple times.
Zircon Island houses the Invincible, an airship that becomes crucial later. Without spoilers, getting here and understanding what happens changes your options for world traversal.
Palamecia Castle is the endgame location where everything climaxes. It’s not just a dungeon, it’s the entire final sequence. You won’t have a choice about visiting here, but knowing it’s coming helps you prepare mentally and mechanically.
Secret Areas And Optional Exploration
Beyond the main-path towns, there are several missable locations that reward curiosity. Falgabard is tucked away in the northeast and contains a Sage job change crystal. This job is absurdly powerful, and getting it early gives you a massive advantage. You won’t stumble onto Falgabard by accident, you need to explore deliberately.
Mythril Dungeon is optional but worth the detour for the gear. It’s a straightforward dungeon, nothing gimmicky, but the rewards (especially if you’re running a Warrior or Dragoon) are premium.
Darugar’s Birthplace is a secret cave that ties into the overall narrative in a way that’s easy to miss. It’s not mandatory for beating the game, but it adds depth to the story if you find it.
The key to finding secret areas is simple: talk to NPCs repeatedly, check every nook of every town, and don’t assume the main path is the only path. The game rewards thorough exploration.
Hidden Caves And Side Dungeons
Final Fantasy III packs dozens of optional dungeons, many of which are easy to walk past without noticing. These side dungeons are where you’ll grind levels, farm specific items, and find powerful gear.
Medusa’s Lair is tucked in the southern regions and filled with Medusa enemies (go figure). The boss fight is tough, but the loot is worth the trouble. Bring multiple White Mages or Clerics and stock up on status-recovery items. Petrification is a real threat here.
Floating Ruins are islands scattered across the map that become accessible once you have an airship. Each one is small but packed with rare encounters and treasure. You won’t get directions to these, it’s pure exploration. That’s the appeal.
Blackest Sea is an underground lake region with its own connected dungeons. It’s visually distinct and contains enemy types found nowhere else. The encounter tables here shift your gear priorities: Ice and Lightning magic become way more valuable.
Tower of Dwarves (separate from Dwarven Cavern proper) is a late-game optional gauntlet. It’s 20+ floors and absolutely brutal. Completing it gives massive experience and access to crafting materials for top-tier equipment. Most players skip it, which is why it exists, it’s for the completionist crowd.
Dragon’s Den lives up to its name. It’s a vertical dungeon where every enemy is a dragon variant. Solo runs here are possible but masochistic. Bring your full party, bring damage dealers, and bring patience. The dragon-slaying loot is phenomenal.
These dungeons aren’t gated by story progression, you can attempt them whenever you want, assuming your levels are high enough. The catch: there’s no way to know if you’re strong enough except by walking in. Save before every new dungeon. Retreat liberally. Grinding in side dungeons is part of the Final Fantasy tradition, and FF3 demands it more than most.
How To Navigate The Map Efficiently: Tips And Shortcuts
Here’s the reality: Final Fantasy III’s map is big, and backtracking is frequent. Without a strategy, you’ll burn through time getting from point A to point B.
First, memorize airship routes early. The moment you get your first airship, spend 20 minutes flying to known locations and marking them. You won’t remember every spot on your first playthrough, but having a mental map of major cities and dungeons saves hours later.
Use Teleport spells. White Mages get Teleport at level 26. This spell instantly moves you back to the last town you visited. It’s overpowered for convenience. Grab it as soon as you can. Later, you’ll unlock Teleport II, which gives you more destination options. These spells single-handedly solve navigation tedium.
Keep a guide nearby for the first playthrough. FF3 doesn’t explain everything clearly, especially about dungeon navigation. The Underworld especially has passages that aren’t obvious. Using Game8’s Final Fantasy III guide or Twinfinite’s walkthrough during your first run saves frustration without ruining the experience. Knowing the broad strokes of where to go next lets you explore the details.
Fast travel when possible. Once you have an airship, use it instead of walking whenever the destination is more than three screens away. The extra few seconds of flying time is worth it compared to the minute+ of footsteps.
Plan dungeon runs in advance. Before entering a long dungeon, know roughly how many floors it has and what the exit strategy is. Some dungeons have one-way doors that force you into specific routes. Knowing this beforehand prevents resource-wasting dead ends.
Stock your team before long treks. Buy potions, ethers, and status-recovery items before heading into unknown territory. Running out of healing items in a deep dungeon is a game-ender. Better to have 20 extra potions you don’t use than to need one more.
The most efficient navigation strategy? Embrace teleportation, use guides liberally, and plan ahead. FF3 rewards preparation more than improvisation.
Rare Items And Enemy Encounters By Region
Different regions spawn different enemies and treasure. Knowing this helps you decide where to grind and which regions to revisit for specific loot.
Northern Continent enemies are straightforward, Goblins, Lizardmen, basic undead. Nothing that requires specialized tactics. The loot is basic too: copper swords, leather armor, healing potions. This region is your grinding farm early game, but it dries up in value quickly.
Sky and Floating Continent regions spawn dragons, flying enemies, and magic-heavy encounters. Red Dragons are common encounters here and drop premium gear. The treasure is almost always magical in nature, robes, staves, spellbooks. If you’re running a Black Mage or Summoner, these regions are your jackpot.
Underworld encounters are harder, but loot is proportionally better. Greater Demons, Wyverns, and Gargoyles drop heavy armor and high-damage weapons. The enemy variety here is dramatic, you’ll face things with completely different movesets than Surface enemies. Adjust your strategy accordingly. Clerics become invaluable down here because of status effects.
Saronia Castle and late-game story dungeons have rare enemy encounters and unique treasure. Paladin armor is locked behind these locations. Holy magic and high-level spellbooks appear here first. If you’re building a specific job loadout, you might need to detour through story dungeons multiple times.
Optional dungeons like Dragon’s Den and Tower of Dwarves have exclusive enemies and loot. Dragon’s Robes only drop in Dragon’s Den. Demon weapons (high attack but drawbacks) only appear in the Blackest Sea region. If you want to min-max your final party, you’ll revisit these zones specifically for farming.
The rule of thumb: harder regions drop better loot. But you need the right jobs to handle those regions. It’s a catch-22 that encourages strategic team building.
According to GameRant’s comprehensive FF3 guide, rare item farming is most efficient when you understand enemy encounter tables. Certain monsters only spawn in specific regions and times. Knowing that Silver Dragons only appear in high-level Underworld zones means you can plan farm runs accordingly instead of wandering aimlessly.
Final Thoughts On Mastering The Final Fantasy III Map
Mastering the Final Fantasy III map isn’t about memorizing every pixel, it’s about understanding the flow of the world and planning your approach accordingly. The game respects players who ask questions, explore deliberately, and come prepared.
Your first playthrough will be slower. That’s not a bug: it’s the intended experience. You’re discovering how the world connects, what threats exist in each region, and where the story pushes you next. Embrace the backtracking. By your second or third playthrough, navigation becomes fluid.
The Underworld is where navigation mastery matters most. You can brute-force the Surface World with decent levels and items, but the Underworld demands spatial awareness and planning. Spend time mapping the Underworld mentally. It pays dividends.
Final Fantasy III is an older game, and its map design reflects that era’s sensibilities: opaque, reward-dense exploration that assumes you’ll use guides or friends for directions. That’s not bad design, it’s just different from modern convention. Knowing that going in helps you appreciate the game’s world-building instead of getting frustrated by it.
Use this guide as a reference, not a crutch. The joy of FF3 comes from stumbling onto secret dungeons, accidentally finding a town you didn’t know existed, and being pleasantly surprised by an optional boss. With these regional breakdowns and navigation tips as your foundation, you’ll get that experience while avoiding the worst navigation frustration. Happy adventuring.

